Main Menu: Testing Soil Sensors
PLEASE NOTE: This article assumes you have already powered up the Collector unit and connected to your local router by entering your Network Name (SSID) and password. Please see these instructions about connecting to your router if you have not done this yet. Also, here is the previous article if you haven't seen it yet (see the full article series at the bottom of this page).
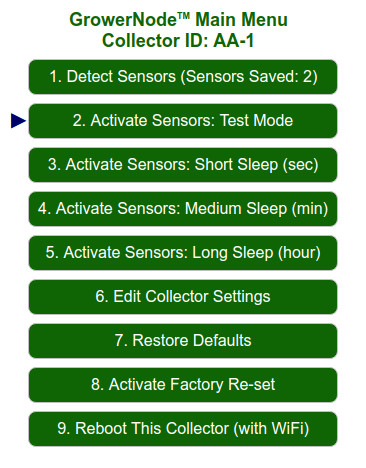
The Collector can test the sensors that are on the saved list and within range of the Collector. The first image above is a screen capture of the Main Menu, with a pointer inserted to indicate the testing function.
We recommend that you follow the instructions from the beginning; here is the previous article if you haven't seen it yet (see the full article series at the bottom of this page).
Please note that the default Collector ID has already been set, but you can change that in the "Edit Collector Settings" menu area.
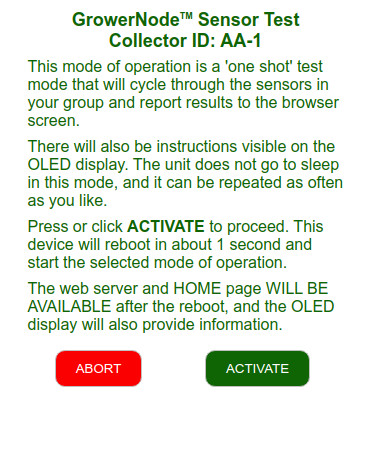
Each menu item has a "preamble" screen that explains what to expect. The second image above is an example of this feature; it is the screen that first appears when you press or click on the "Test Sensors" button. You can either proceed with the intended function by pressing the ACTIVATE button, or you can press the ABORT button to abandon the operation and return to the main menu.
Main Menu: Testing Sensors: A Successful Test
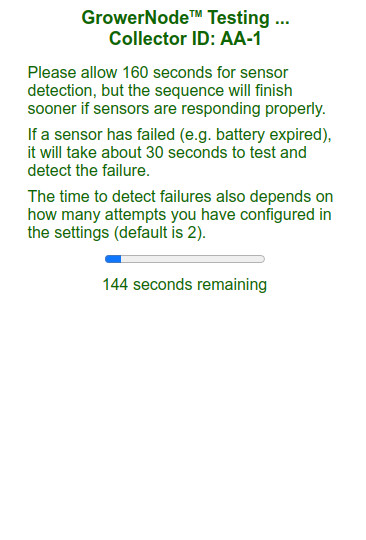
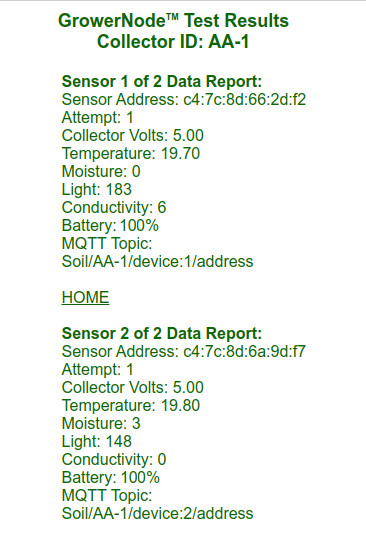
The first screen pictured above is the timer screen that will be presented when you click or press the ACTIVATE button on the preamble info screen. The G.R.O.W.S.™ system automatically calculates the maximum required time, but when the sensors are functioning normally the process will likely complete much sooner than the allocated time, and the TEST RESULTS screen will be presented (as in the second screen capture above).
Please note that the readings for the conductivity (fertilizer content) and soil moisture are close to zero (or at zero) because the probes were not inserted into any soil when we prepared these instructions.
Main Menu: Detect Sensors: If No Sensors Are Detected
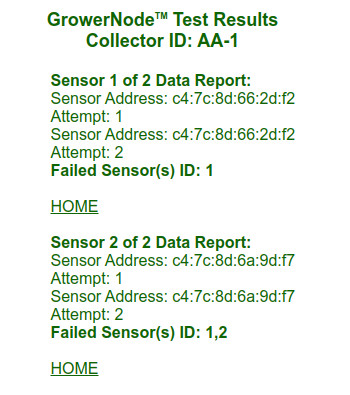
If your sensors are out of range, or perhaps you didn't activate the batteries, the Collector will display a screen similar to the picture above. Note that it has re-tried twice in the example screen above; you can change the number of attempts in the "Edit Collector Settings" menu item.
Need More Info? See Article Series Below ...
You can purchase the soil moisture sensors, along with the Collector units in our sister DIY online store DIY online automation store.
We sincerely hope you enjoy our advanced technology products; if you have any questions, please contact us at any time!
Adrian Biffen
Senior Partner
GrowerNode™ Greenhouse Automation
G.R.O.W.S.™ System Article Series
|
G.R.O.W.S: GrowerNode Realtime Optimal Wireless Sensors |
The Collector:Part 1: Wireless Soil Sensor Collector Overview Part 2: Menu: Wireless Sensor Detection Process Part 3: Menu: Wireless Soil Sensor Testing Process (You are here) Part 4: Menu: Wireless Soil Sensor Sleep Modes Part 5: Menu: Edit Collector Settings Part 6: Menu: Restore Collector Defaults Part 7: Menu: Activate Factory Re-set |
The Sensors:Part 1: Wireless Soil Sensor Overview Part 2: Wireless Soil Sensor Activation |
|
The Cloud:Part 1: See Your Data from Anywhere |
