GrowerNode™ is the name for our greenhouse and garden environmental sensing and control system. It is an internet based system for sensing and control of greenhouse, field and garden operations. The 'Islander' is our small prototype greenhouse design used as a demonstration project.
In Part 4, we showed details of the concrete pour for the foundation pier footings, Part 5 will cover the details of the main girder construction and floor modules.
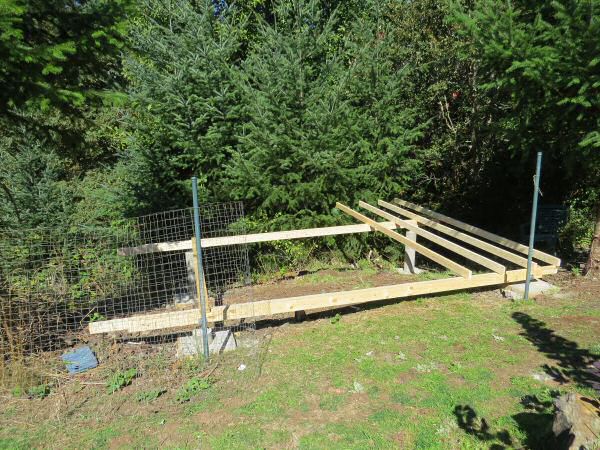
In the above picture, the first floor joists are placed, just to get an idea of the positioning. The plan is to make 4x8 floor modules with plywood, and have these modules insulated with bubble wrap. We used plywood for the construction, instead of the cheaper OSB strand board because of water concerns. OSB does not like to get wet, so we will make this structure entirely with plywood for siding, flooring and roofing. The lower grade plywood isn't much more expensive, although it too should be painted and sealed before it gets water on it.
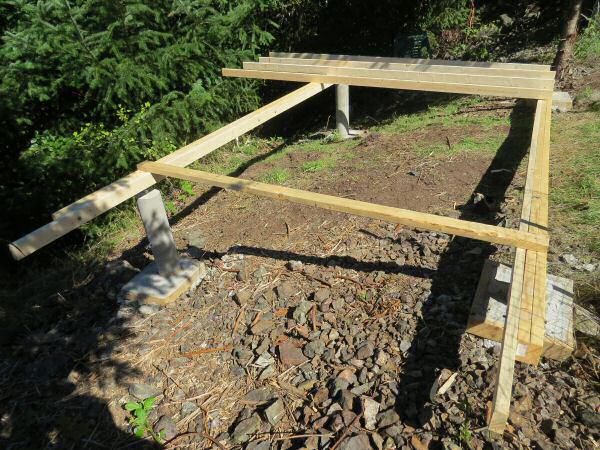
The design calls for additional 2x6 support beams to be added to the main girders, after the adjustment saddle has been bolted to the girders. In the above picture you can see how we also extended the main beams by a foot.
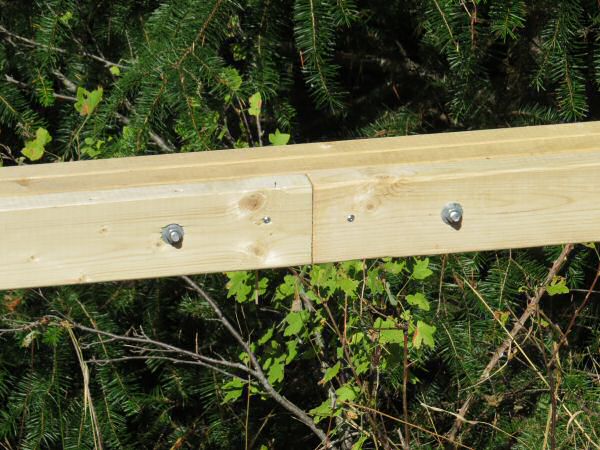
We used two eight foot 2x6 stiffeners, for an overall girder length of 16'. This adds a foot to the entry deck and creates a one foot rear storage deck, and support for these extensions will be further bolstered by the angled beams anchored to the embedded bolts in the foundation piers.
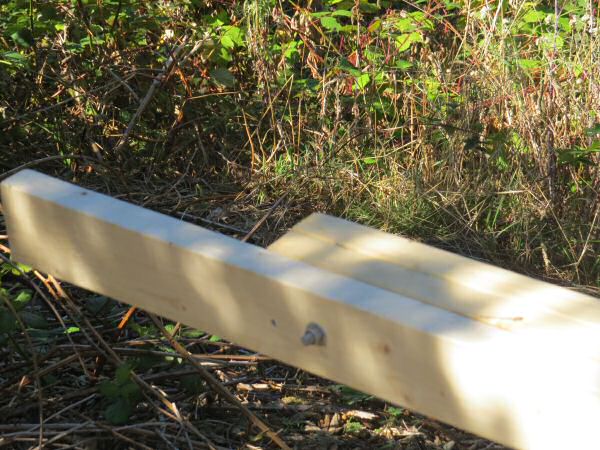
Here's another view showing the main girder beam extension, and the 3/8" galvanized through-bolts that hold all three 2x6 beam components together.
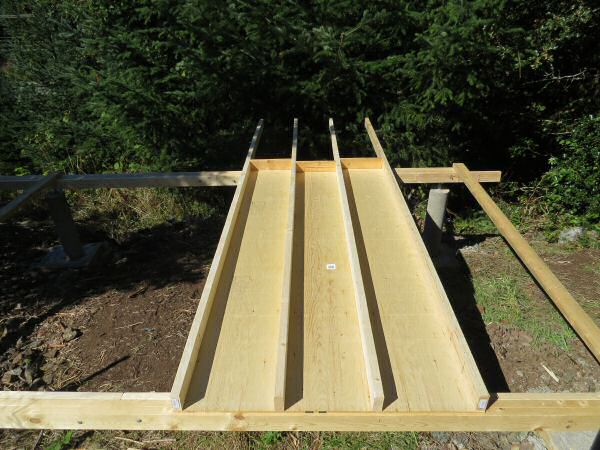
The supporting foundation structure is basically done at this point. Now comes the construction of the floor modules with bubble wrap insulation. An important design consideration was the removeable 2x6 blocking that seals the floor at either end of the insulated floorboards. They will be sealed tight to minimize thermal loss, but they can also be opened at a later time if we want to insert something into the floor (piping, conduit, insulation, etc).
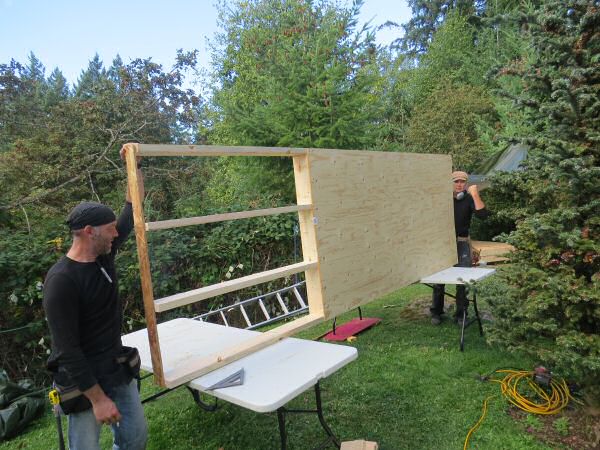
Here Andy and Stew have almost finished a floor module, with under-sheathing attached, flipping it to carry it over and lay on the structural beams, ready for attaching the plywood flooring. The monsoons are coming in soon, and it is nice to be able to make these off-site in a warm and dry location. We used 3/8" sheathing underneath, and the modules have 1/2" plywood on 16" centers (roughly) for the main flooring. It's also nice not to have to try and fasten the under-sheathing by crawling under the structure and lifting it up while it is fastened.
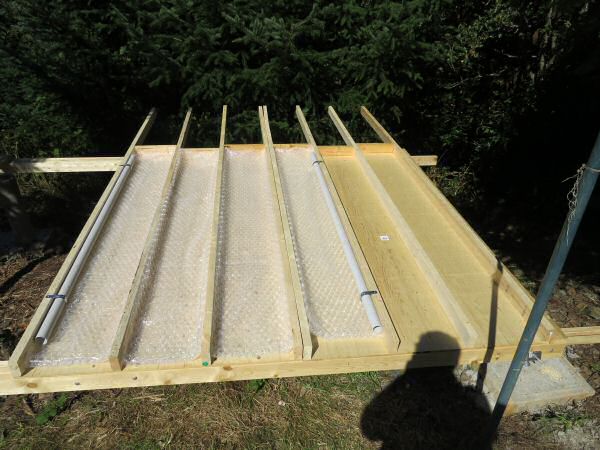
Before we fill the floor cavity with bubble-wrap, we placed some plastic tubing inside the floor so that we can run sensor wires, control lines, etc. at a later time. We used indoor vacuum tube piping for this purpose, and put a pull string through it. This tubing is quite adequate (and inexpensive) for the purpose of carrying low voltage sensor and control signals for motors, actuators and valve control. There will be one conduit at each end wall and one in the middle, although that can be changed anytime due to the removable blocking that gives us access inside the sealed floor module.
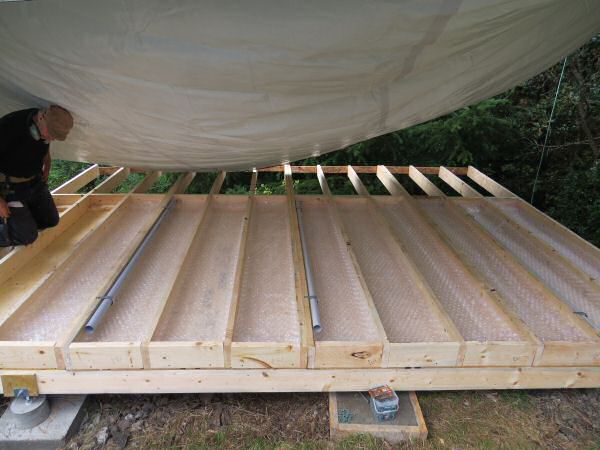
Stew inspects the final assembly before the 1/2" flooring goes on. We used 2 layers of 'large bubble' industrial grade bubble wrap for insulation. It is affordable, relatively non-toxic (compared to handling fibreglass) and easy to adjust. A few staples from an ordinary staple gun holds it in place nicely. If you have kids, we don't reccomend using this as it is way too much fun popping these big bubbles.
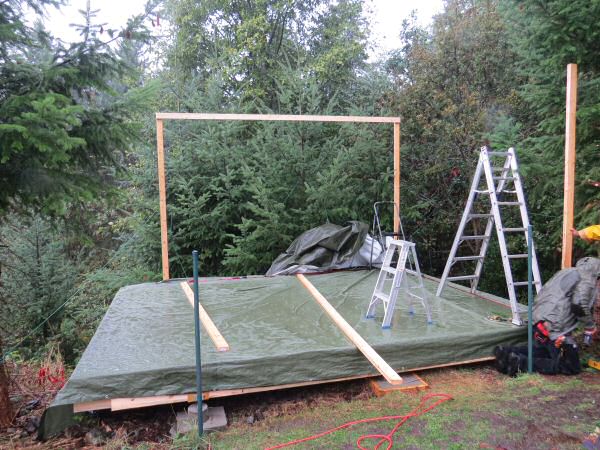
In this picture, the floor is complete, but we had to tarp it right away and erect a protective tent as the monsoons moved in quickly with a cloudburst that started a downpour.
GrowerNode™ Greenhouse Construction Index (The Islander):
Part 1: Greenhouse Construction: Introduction
Part 2: Greenhouse Construction: Site Prep & Footings Forms
Part 3: Greenhouse Construction: Foundation Concrete Footing Pour
Part 4: Greenhouse Construction: Foundation Pier Column Setup
Part 5: Greenhouse Construction: Bubble Wrap Insulation re Floor Joist Modules (you are here)
Part 6: Greenhouse Construction: Framing the Structure for Bubble Wrap vs Glass Walls
Part 7: Greenhouse Construction: Roof Module Installation
Part 8: Phase 1 Completed, Ready for Finishing Stain & Bubble Wrap Skin